Kabuto Instructions and Troubleshooting
Please read all of this article
This device functions similarly to the Hoffman Tactical Super Safety but does NOT require any trigger cut and utilizes a standard AR safety switch.
You will need a full-auto spec BCG! I recommend this one, but any that is full-auto spec will work. The device will not function with a semi spec BCG.
You will also need an AR15 cut lower (not M16 cut).
https://palmettostatearmory.com/psa-toolcraft-5-56-phosphate-mpi-full-auto-bolt-carrier-group-no-logo.html
This device is confirmed to work with Milspec triggers. We are in the final stages of a Larue compatible version. Next will be testing with Geissele triggers.
The included safety still functions as a normal safety if the drop in device is removed so there is no need for disassembly after the selector is installed.
Installation

AR9 Variation:
The only difference between installation of the AR-15 Kabuto and the AR-9 Kabuto is the AR-9 comes with a spacer you will need to put behind your buffer weight, as shown:

Once installed, dryfire test with the spacer. They are intentionally longer than needed so they can be shaved down with a blade until trigger reset consistently occurs. Simply shave down small amounts until the bolt resets your trigger each time it is racked.
Your kit will include your Kabuto device and your selector (material differs based on the option you chose)
First, remove your pistol grip and old safety selector.
For Nylon Selectors: Simply install like normal and reinstall your pistol grip
For Metal Selectors: Remove the screw from the right side of the selector. Pop off the lever by pushing it to the rear. Insert into the safety position on the lower and reinstall the plunger and pistol grip. Slide the lever back on to the right side of the lower. Screw the screw in all the way. It will take some inward force, this is on purpose. You do not need to use any loctite or thread lock for these screws. We designed it like that on purpose.
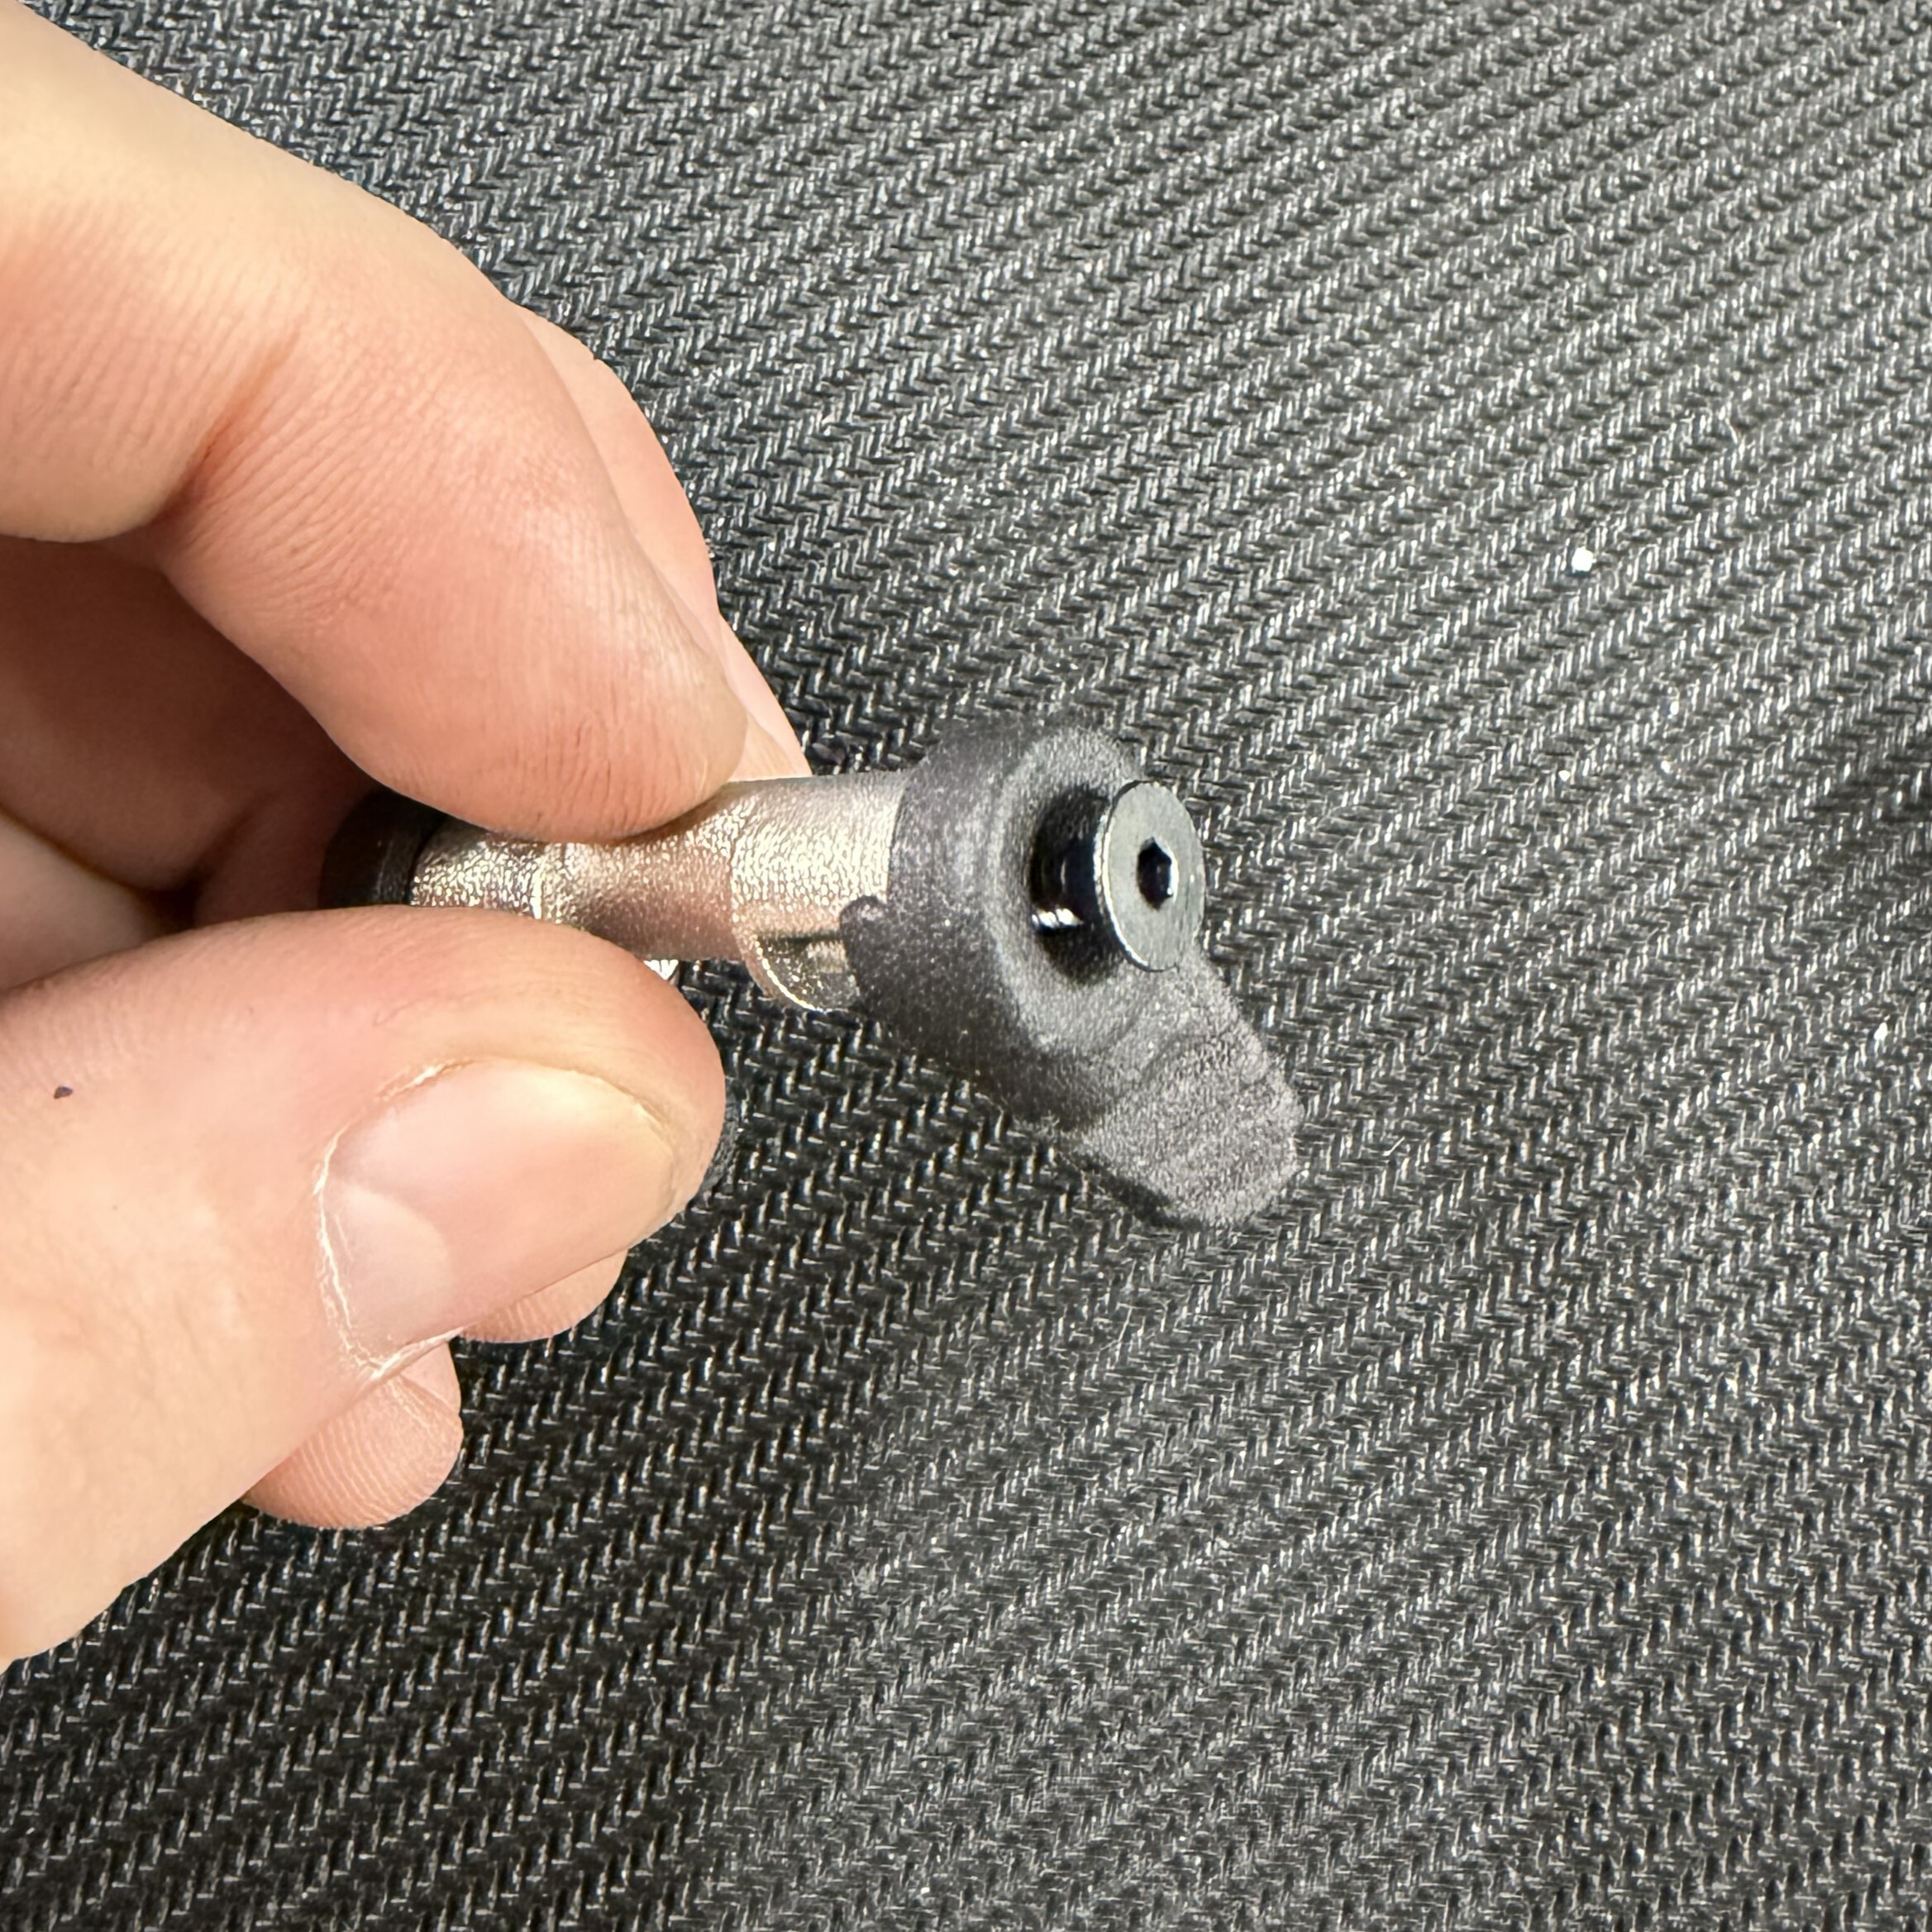
Slide your device around your hammer and press into the lower so it sits flush with the top of the lower.
Reinstall your upper.
This device does have a break-in period. If it does not function perfectly in the third position when dry firing, we recomment shooting 1-2 magazines in the semi position to break the parts in and allow them to fit with the lower and trigger. After that, try the third, FRT, position.
Troubleshooting
Not all lowers and triggers are the same. During testing, my lower functioned perfectly with no modification needed. My wife's lower needed small adjustments made to function perfectly. Both lowers and triggers are mil-spec and cut now needed. Tolerances stack and sometimes things need adjusting.
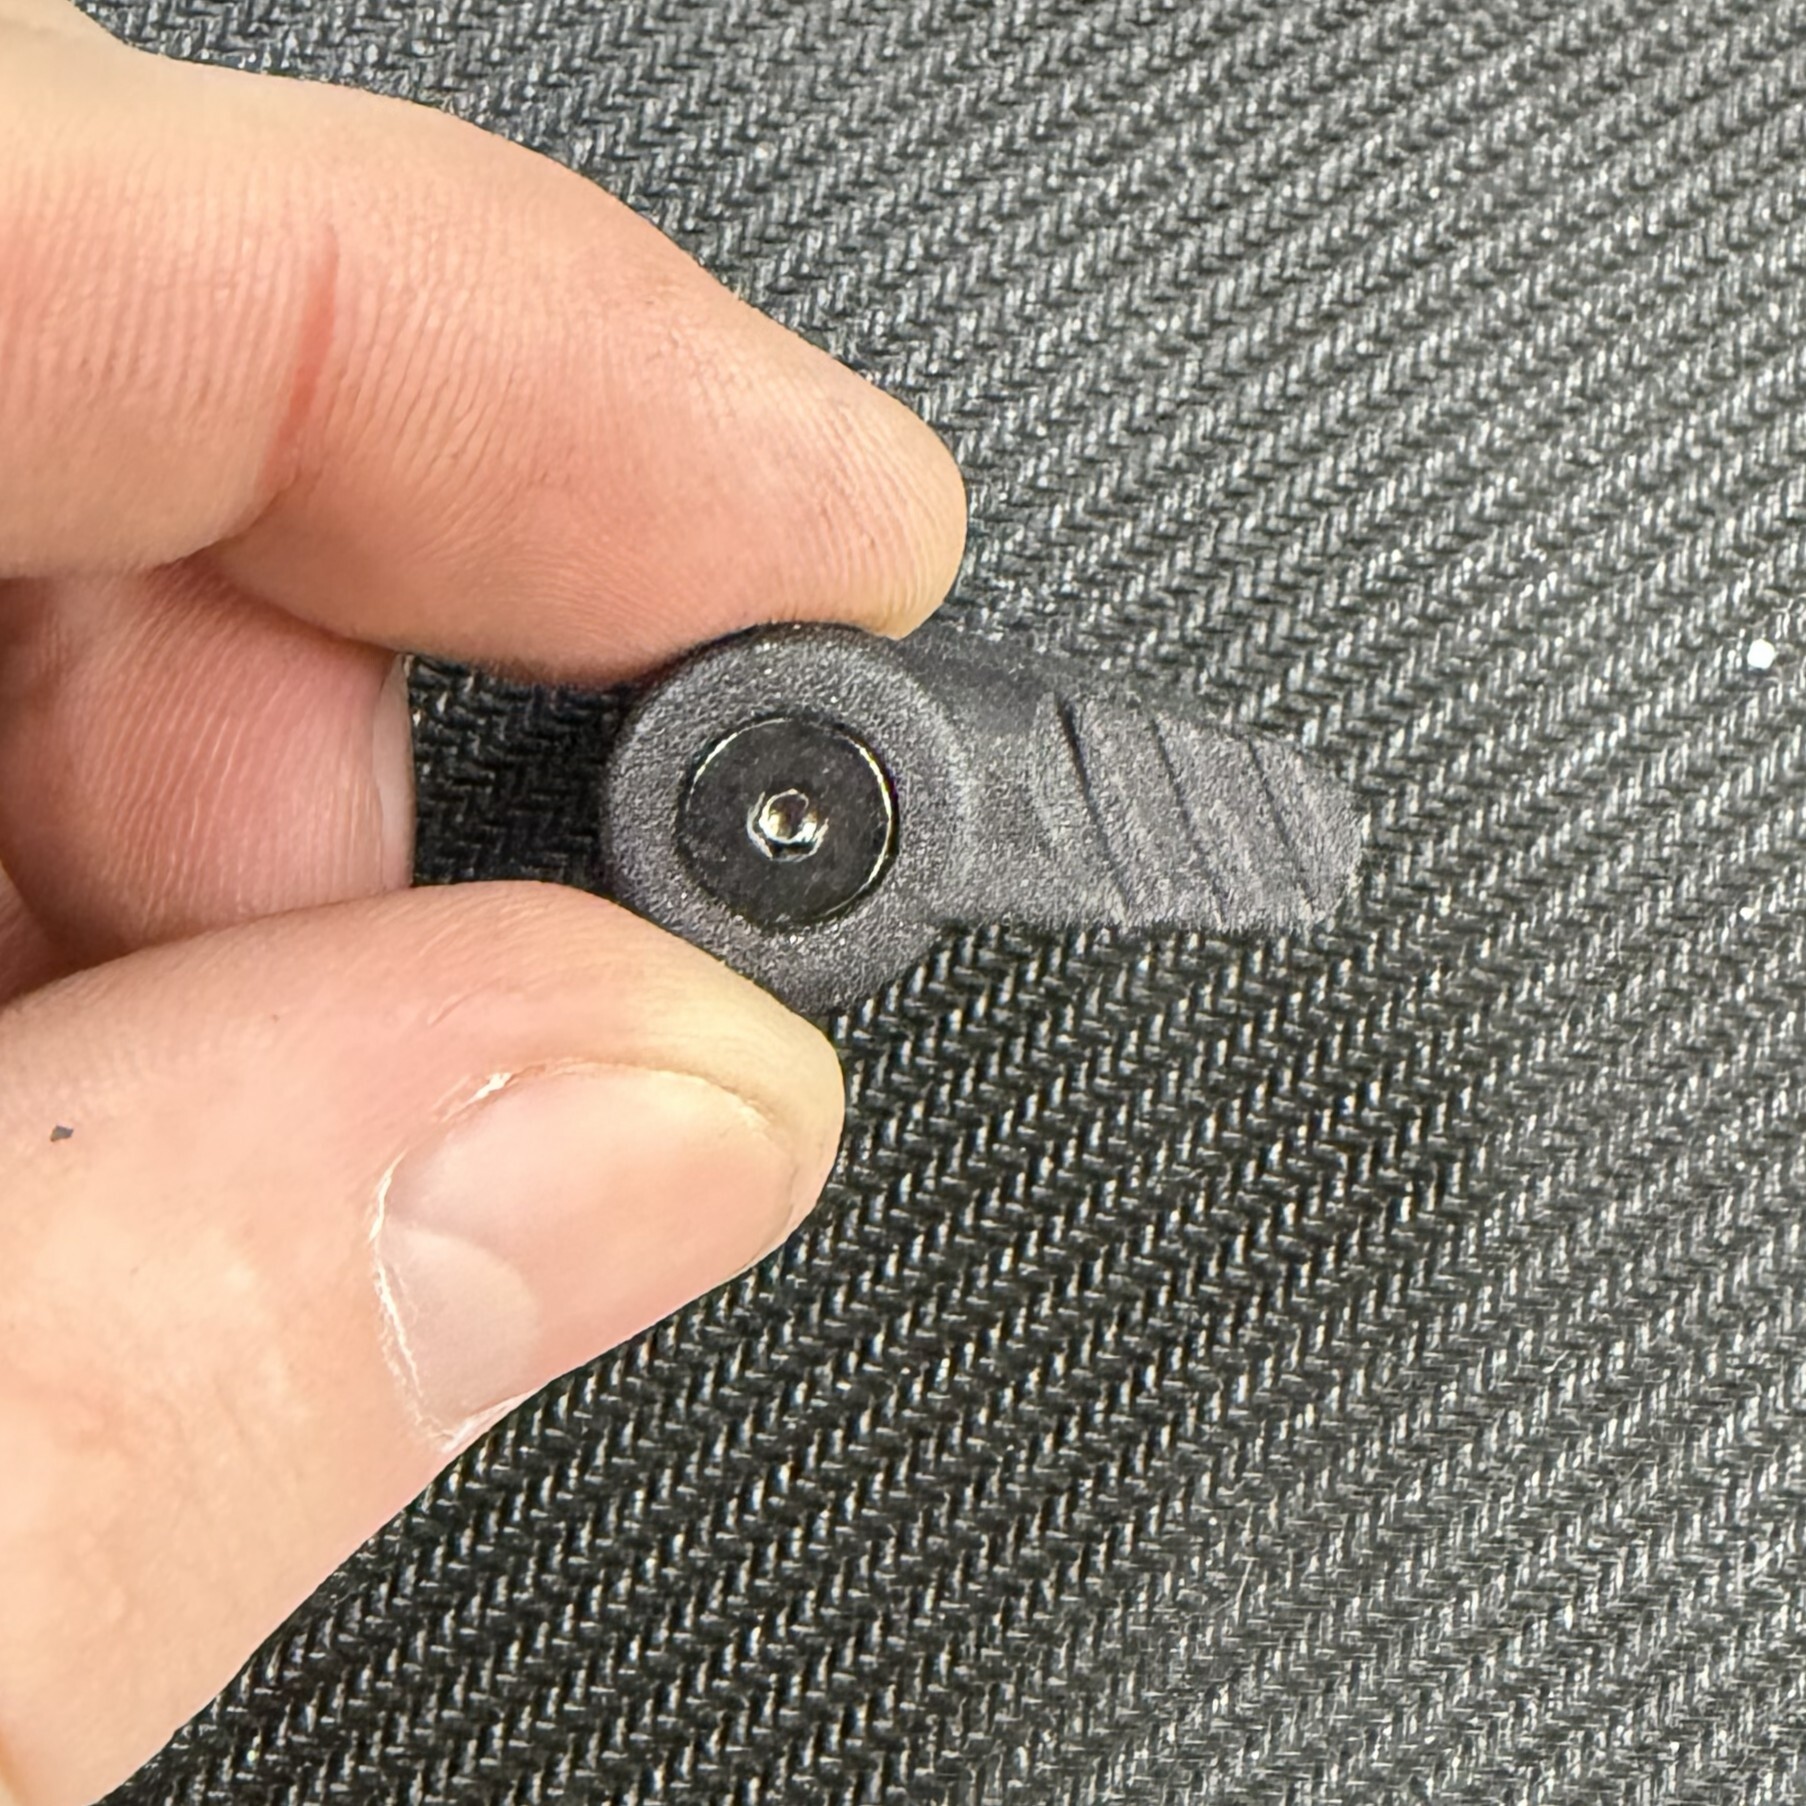
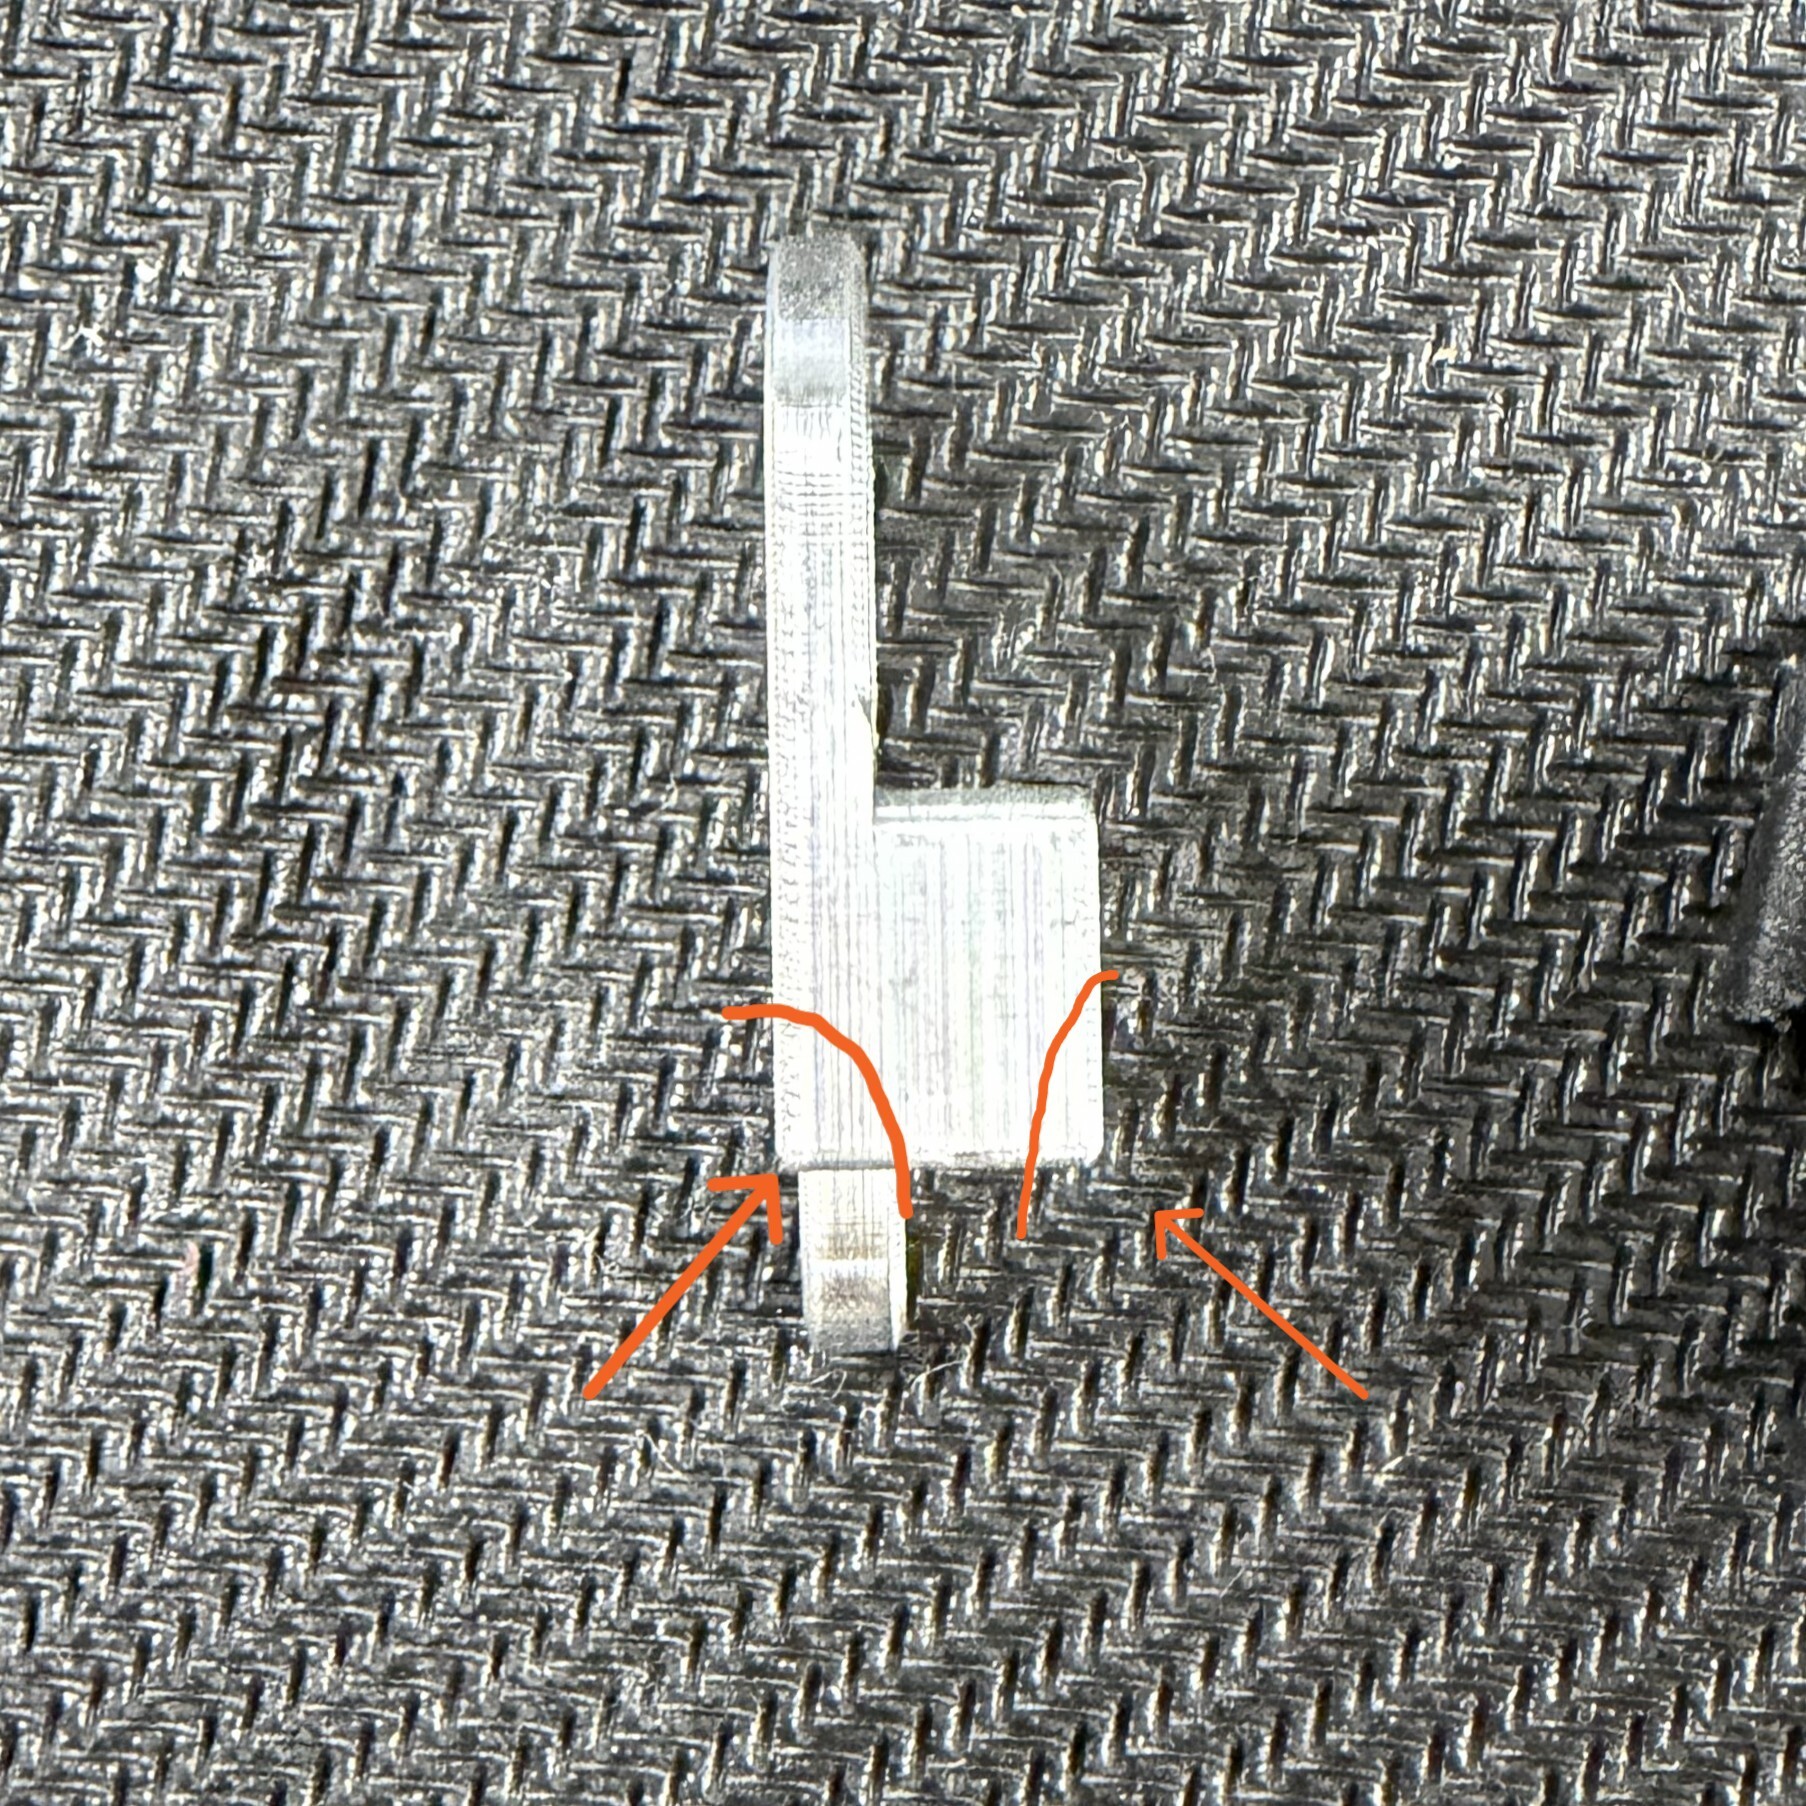
If it feels as though the hammer or trigger is getting stuck, you may need to file the plunger in 2 spots.
This tuning can be done with a standard hand file and its relatively easy to do.
Remove the plunger from the drop in and file in the 2 spots shown in the photo below.
On the off chance that this tuning doesn't solve the issue, we are including the nylon plungers with every order. Simply install that with no modification.
For any questions, comments, or concerns, please reach out to use at walker@textacdesigns.com
We will be happy to answer any questions or replace any parts needed.